WordPress is a content management system that powers 42% of all websites worldwide. It’s the most popular CMS on the market that makes a great platform for building a corporate website.
Many people choose WordPress because it’s free and relatively easy to use. No need to hire a web designer that may cost you a lot of money. Moreover, WordPress also offers many plugins and themes you can use to design a site however you like.
In this article, we will look at why WordPress may be the best choice for you. We’ll also go through a step-by-step guide to creating a website with WordPress.
1. Choose a Domain Name and Business Email
A domain name is an address that internet users type into the search bar to visit a website, such as yourcompany.com.
For consistency, try to use your company name as your domain name. And if you’re still looking for a company name, use a name generator tool to come up with ideas.
Then, go to a domain availability checker to see if your desired domain name is available. Also, consider checking the name on social media platforms, like Facebook and LinkedIn, to ensure no business pages are using that name.


Once you make your mind up and decide to make a purchase, go to one of the many domain registrars and register it under your name. However, it may be worth checking if your WordPress hosting services include a free domain name registration first, as that’s a common deal they offer.
2. Pick the Right Web Hosting
Hosting acts as a website’s storage for codes, images, files, and everything else your website requires to function.
For a corporate website, consider choosing a shared hosting plan as it’s budget-friendly and easy to maintain. In addition, there is no need to worry about the back-end issues, like security and backup, as the hosting provider will usually take care of them.
One click-installer can also be an essential factor when picking a web host. It can help you quickly install needed applications, like WordPress.
3. Pick Your WordPress Theme
To choose a WordPress theme, click Appearance on the left menu, then Themes. Finally, click Add New to explore more theme options.
There are thousands of themes available. To filter the options, click Feature Filter, and tick a box based on your website’s required functions, ideal features, and layout. Then, click Apply Filter.

When picking a WordPress theme, make sure it is responsive and matches your branding elements, like logo and color scheme. It’s because visual consistency helps increase revenue and brand recognition.
Therefore, consider previewing the themes to check the overall looks. Once you’re sure with a theme, click Install -> Activate.
4. Customize Your Website
The WordPress theme can seem too generic, so try to personalize it to make your website unique.
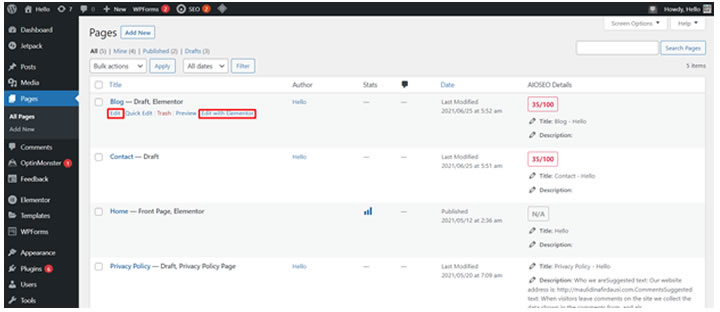
Start customizing your website by organizing the pages to structure your website’s content. Click Pages -> All Pages. Here, you’ll see the pre-built options.
Click Add New to add other essential pages, such as:
- Homepage
- About page
- Contact page
- Blog page
Then, upload your logo to show your brand identity. To do that, click Appearance -> Customize -> Header Builder -> Logo. Click Select Logo and upload the image file.
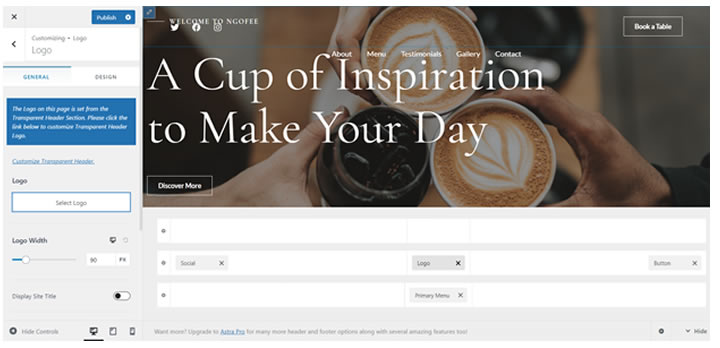
If you don’t have a logo, using an online logo generator can be a helpful trick. Most of them also come with templates for various industries, so you can quickly pick one that reflects yours best.
After uploading the logo, customize other elements if necessary, like typography, colors, and buttons. To change them, go to the Customize dashboard and click Global.
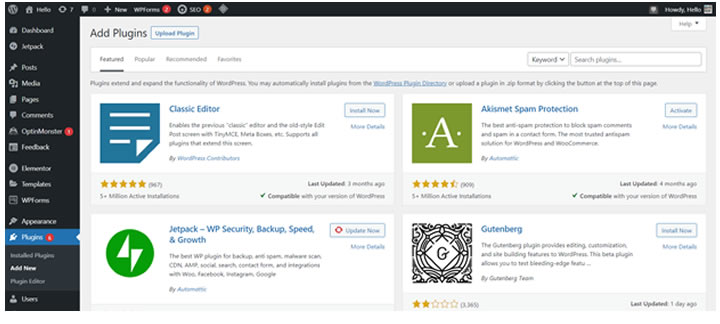
5. Install Essential Plugins
WordPress offers many plugins to add more features to your website.
Here are plugin recommendations to install:
- A WordPress builder with a drag-and-drop editor to design the pages without coding knowledge.
- Yoast SEO. An SEO WordPress plugin to help the website rank organically.
- A security plugin to clean up malware and protect your website from unauthorized logins.
- Google Analytics. An analytics plugin to help you understand website traffic and user behavior.
To install WordPress plugins, go to Plugins on the left menu, then click Add New. Next, find plugins you need on the search bar, then click Install Now -> Activate.
6. Upload Content
The next step is to create content for your website.
Each page has different content to include. For example, an About page usually consists of the company history and employee profiles, while a blog page contains articles.
Writing high-quality and unique content may feel daunting, but an AI content generator can help. The tool can generate content based on your needs. Then, all you’ll have to do is edit it to match your branding.
When the content is ready, go to All Pages and click Edit. Or edit with your website builder and publish the content that way.
For blogging, click Posts -> Add New to add content to your blog page.
Conclusion
The first step of building a WordPress website is purchasing a domain name and hosting.
Then, install the software and start picking a theme. As the theme may appear too generic, consider customizing the appearance by uploading your company logo and changing the elements, like color and fonts.
After that, install necessary plugins, such as SEO and security plugins. Once everything is ready, start creating the content.
And voila! You have made yourself a corporate website.